You’ve likely marveled at the rich, warm sound that emanates from your turntable. But what if I told you that a small but essential aspect of your setup, known as grounding, could significantly impact the quality of your listening experience? In this article, I’ll explore how it works and guide you through the steps to properly ground a turntable.
But at first, you might be wondering what turntable grounding is and why it is so crucial for optimal sound quality. To put it simply, grounding is the process of connecting your turntable to a common ground point, often your amplifier or preamplifier, to eliminate electrical noise.
With a proper grounding setup, you’ll notice a significant reduction in the strange little “hum” or “buzz” that can plague turntables. Moreover, grounding helps protect your equipment from potential damage due to electrical surges. So, not only are you enhancing your audio experience, but you’re also investing in the longevity of your turntable system.
Types of turntable grounding

Chassis grounding
Chassis grounding, also known as frame grounding, focuses on connecting the metal chassis of your turntable to a common ground point. This is typically done to eliminate unwanted noise caused by static and electromagnetic interference. Chassis grounding is particularly handy for turntables with metallic components, as these materials are more prone to picking up electrical noise.
Signal grounding
Signal grounding is all about maintaining the audio signal’s integrity as it travels from your turntable to your amplifier or preamplifier. In this type of grounding, the goal is to create a consistent reference point for the audio signal’s voltage. By doing so, you minimize the risk of signal fluctuations that can lead to distortion, noise, or other audio imperfections.
Earth grounding
Earth grounding, sometimes referred to as safety grounding, is the process of connecting your turntable and other audio components to the earth ground in your electrical system. The primary purpose of earth record player grounding is to protect your equipment and, more importantly, you from potential electrical hazards, such as shocks or surges.
How to properly ground your turntable setup

What tools you’ll need to ground your setup
Grounding your turntable doesn’t require an extensive toolkit or advanced technical skills. However, here’s a list of essential tools you’ll need to do this job:
- Grounding wire — acts as the pathway for unwanted electrical noise to be channeled away from your audio signal. Choose a high-quality, insulated wire for optimal performance and durability.
- Wire stripper — allows you to remove the insulation from the ends of the grounding wire, exposing the conductor underneath.
- Screwdriver — lets you connect your grounding wire to your turntable and amplifier or preamplifier. Depending on your audio equipment, you may need a flathead or Phillips head screwdriver to loosen and tighten the grounding terminals.
- Multimeter (optional) — while not strictly necessary, a multimeter can be incredibly useful for verifying the success of your grounding efforts. By measuring the electrical resistance between your turntable and ground point, you can confirm that you’ve established a solid connection.
How to ground your turntable setup properly
Step 1: Locate the grounding terminals
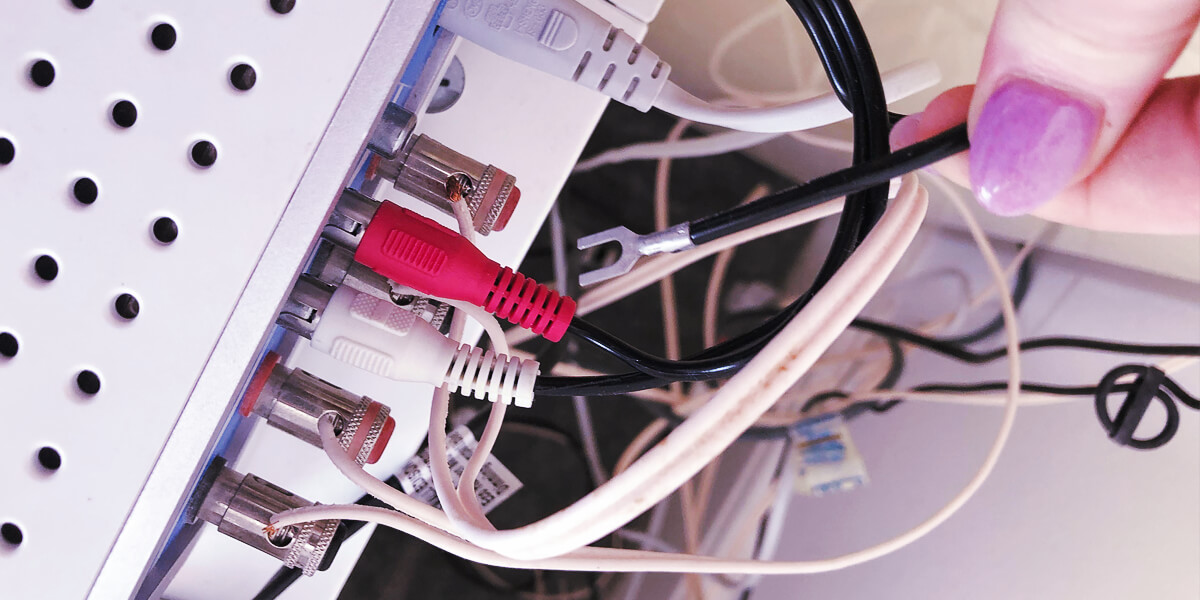
First, identify the grounding terminals on both your turntable and amplifier or preamplifier. They are usually labeled “GND” or “GROUND” and may feature a small screw or thumb nut.
Step 2: Prepare the grounding wire
Using the wire stripper, remove about 1/2 inch (1.3 cm) of insulation from both ends of the turntable ground wire, exposing the conductor inside.
Step 3: Connect the grounding wire to the turntable
Attach one end of the grounding wire to the grounding terminal on your turntable. To do this, loosen the screw or thumb nut on the terminal, wrap the exposed wire around the screw or under the thumb nut, and then tighten it back down to secure the connection.
Step 4: Connect the grounding wire to the amplifier or preamplifier
Repeat the process from Step 3 with the other end of the grounding wire, connecting it to the grounding terminal on your amplifier or preamplifier.
Step 5: Verify your connections
Double-check both connections to ensure they are secure and that the exposed wire is in good contact with the grounding terminals.
Step 6 (Optional): Test your grounding with a multimeter
If you have a multimeter, you can use it to confirm that your grounding is successful. Set the multimeter to measure resistance (ohms), and place one probe on the turntable’s grounding terminal and the other probe on the amplifier or preamplifier’s grounding terminal. A low resistance reading indicates a solid grounding connection.
Step 7: Enjoy your improved audio experience
With your turntable now properly grounded, you should notice a significant reduction in electrical noise, hum, or buzz. Sit back and enjoy the optimized sound quality of your vinyl collection.
Common issues with a record player grounding

Persistent hum or buzz despite proper grounding
If you’ve followed the grounding steps and still experience a hum or buzz, it might be due to a ground loop. A ground loop occurs when multiple devices in your audio system are connected to different ground points, creating a loop that allows electrical noise to enter the signal path.
Solution: To fix turntable hum, connect all your audio equipment to a single power strip or outlet, ensuring they share a common ground point. Alternatively, you can use a ground loop isolator, which is specifically designed to eliminate ground loops and reduce noise.
Inconsistent or intermittent hum
If the hum in your audio comes and goes, it could be due to a loose grounding connection or a damaged grounding wire.
Solution: Double-check the grounding wire connections at both the turntable and amplifier or preamplifier, ensuring they are secure and making good contact. If the issue persists, consider replacing the grounding wire with a new, undamaged one.
No grounding terminal on your turntable or amplifier
Some turntable models or amplifiers might not have a dedicated grounding terminal, making it difficult to establish a proper grounding connection.
Solution: In this case, you can try connecting the grounding wire to an exposed metal part of the turntable or amplifier chassis, such as a screw or metal casing. Ensure that the metal part you choose is connected to the device’s internal ground.
Hum or noise increases when touching the turntable or audio components
If the noise level increases when you touch your turntable or other audio equipment, it might be due to a lack of proper earth grounding.
Solution: Make sure that all your audio equipment is connected to a properly grounded power outlet. If the problem persists, consult an electrician to inspect your home’s electrical grounding and ensure it meets safety standards.
Common misconceptions about turntable grounding

Newer amplifiers or receivers eliminate the need for turntable grounding
While it’s true that some modern amplifiers or receivers have built-in grounding solutions, it doesn’t necessarily mean that turntable grounding is no longer required. In some cases, even with newer equipment, grounding your turntable can still lead to a significant reduction in noise, hum, or buzz.
All turntables need external grounding
Not all turntables require an external grounding wire. As I mentioned earlier, self-grounded turntables have their grounding wire integrated into the audio cables, eliminating the need for a separate vinyl player grounding connection. So, identify whether your turntable is self-grounded or externally grounded before attempting to ground your setup.
The thicker the grounding wire, the better
While I always recommend using a high-quality grounding wire, using an excessively thick wire doesn’t necessarily result in better grounding. The key is to choose a grounding wire with sufficient conductivity and insulation to ensure a proper grounding connection while maintaining flexibility for easy installation.
Turntable grounding only affects sound quality
Although grounding your turntable primarily improves sound quality by reducing electrical noise, it also serves as a safety measure. Proper grounding can protect your equipment from potential electrical hazards such as shocks, surges, or even damage due to lightning strikes.
FAQ
Can using the wrong type of grounding cause damage to my turntable or other components?
Using the wrong grounding type is unlikely to cause severe damage to your turntable or other components. However, improper grounding can lead to unwanted noise, hum, or buzz, which can negatively impact your listening experience. It might sometimes cause electrical interference with other devices in your audio setup.
How often should I check my turntable’s grounding connections?
There’s no fixed rule for how often you should check your turntable’s grounding connections, but it’s good practice to inspect them whenever you’re performing routine maintenance or troubleshooting audio issues.
Is it safe to ground my turntable myself?
Yes, grounding your turntable yourself is generally safe, as long as you follow proper guidelines and instructions provided in your turntable and audio equipment user manuals. However, if you’re unsure or uncomfortable with the process, it’s always best to consult a professional or an experienced friend for assistance.
Can improper turntable grounding cause damage to my vinyl records?
Improper turntable grounding is unlikely to cause direct damage to your vinyl records. However, it can contribute to poor audio quality, which can detract from your overall listening experience.