As a long-time turntable user, I can’t stress enough the significance of regular turntable cleaning. Not only does it ensure optimal sound quality, but it also prolongs the life of your beloved turntable and cherished records. After all, who wouldn’t want to enjoy their favorite tunes with the crisp, warm sound that only vinyl can deliver?
In this article, I’ll guide you through the essential steps for cleaning and maintaining your record player. You’ll learn how a few simple habits can make a difference in your listening experience and prolong the life of your favorite “musical friend”.
Cleaning your record player

A clean record player is the key to excellent sound quality and the longevity of your turntable. So, let me show you how to take care of your device properly.
Dusting the turntable and components
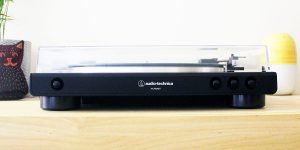
Dust is the main enemy of your record player. Over time, it can accumulate on various parts of your turntable, affecting performance and even causing damage. Regular dusting will help you keep your record player in pristine condition. Here’s how you can effectively dust your turntable and its components:
- Before you start, make sure to turn off and unplug your record player to avoid any electrical hazards.
- Gently wipe the surface of the turntable, including the platter, plinth, and any other exposed components. Use a soft, lint-free cloth to avoid scratching or leaving residue behind.
- For hard-to-reach areas or intricate components, a can of compressed air can be a great help. Use short bursts and keep the canister at a safe distance to avoid damaging your turntable.
Cleaning the stylus and tonearm
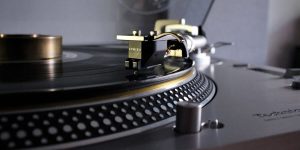
The stylus and tonearm are key components of your record player, responsible for extracting the audio information from your vinyl records. So, as you proceed with cleaning a turntable, make sure you also pay attention to these details. For example, here’s how I clean a stylus and tonearm on my turntable:
- I use a stylus cleaning brush or a specially designed stylus cleaning fluid to gently remove any dust or debris from the stylus tip. Remember to always brush from the back of the stylus towards the front to avoid damaging the delicate cantilever.
- For the tonearm, I use a soft, lint-free cloth dampened with a little isopropyl alcohol or a dedicated record-cleaning solution. I gently clean the tonearm, avoiding contact with the cartridge and stylus.
- I also made it a habit to inspect my stylus and tonearm regularly, particularly after playing records that may have excessive dust or visible debris.
Turntable belt maintenance

If your record player is belt-driven, pay attention to the condition and performance of the turntable belt. Regular belt maintenance will help you prevent speed inconsistencies and reduced sound quality.
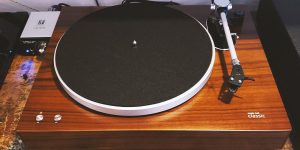
Inspecting the belt
Routine inspection of the turntable belt will help you identify potential problems and ensure it’s in good working condition. Here’s how to check your belt.
First, turn off and unplug your turntable. Then, carefully lift the platter off the turntable, exposing the belt underneath. You may need to consult your turntable’s manual for specific instructions on removing the platter. After this, check the belt for any signs of wear, such as cracks, fraying, or stretching. If the belt appears damaged, it’s time to replace it.
Cleaning the belt
A clean belt will ensure smooth operation and prevent unnecessary wear. To remove dirt from this turntable component, carefully slip the belt off the platter and motor pulley, taking note of its position for reassembly. Next, use a soft, lint-free cloth dampened with a little isopropyl alcohol to gently clean the belt, removing any dirt or debris. Allow the belt to dry completely before reassembling your turntable.
Lubricating and tightening components

If you are interested in achieving stable playback and exceptional sound quality, then you shouldn’t take proper maintenance of the record player’s moving parts and connections lightly.
Lubricating components
Lubrication delivers smooth operation of your record player’s moving parts. By reducing friction, lubrication helps minimize wear and prolong the life of your turntable components. Here’s what you need to know about lubricating your record player.
Common components that may require lubrication include the motor, spindle bearings, and tonearm pivot points.
Opt for a high-quality lubricant designed specifically for turntables or other precision instruments. Avoid using household oils or greases, as they can attract dust and cause more harm than good.
Use a small amount of lubricant, applying it sparingly to the necessary components. Be cautious not to over-lubricate, as an excess lubricant can cause damage or attract dust.
Tightening connections
Regularly inspecting and tightening screws, nuts, and bolts will help you maintain a solid foundation for your record player. Here is how you can tighten the connections if they get loose.
First, check for any loose screws, nuts, or bolts on your turntable and its components. This includes the plinth, tonearm, and any other parts that may require tightening. Use the right tools, such as a screwdriver or wrench, to gently tighten loose connections. Be cautious not to overtighten, as this can cause damage to your turntable components.
Make it a habit to inspect your turntable for loose connections periodically, especially after moving or adjusting your setup.
Establishing a routine maintenance schedule
Establish a routine maintenance schedule that includes periodic inspections, lubrication, and component tightening to ensure your record player’s longevity and optimal performance.
- Dust and clean your turntable and its components regularly, ideally after each use or at least once a week.
- Consult your turntable’s manual to determine the recommended frequency for lubricating specific components. As a general rule of thumb, lubricate moving parts once a year or as needed.
- Inspect and tighten any loose connections every few months or whenever you notice any instability in your turntable’s performance.